Install A TV Box
This article explains the new process for installing a resident set top box, and manually updating a set top box that is currently in storage (not powered up or online as of January 19, 2022).
Summary
Beginning January 19, 2022 we are rolling out a new update for OdessaConnect resident set top boxes called Self-Guided Install. This update guides the installer through the setup screens and is intended to simplify/speed up the process.
Click here for step by step instructions on the new Self-Guided Install process >>
All of the TV boxes that are currently online will receive this update overnight on Wednesday, January 19 2022. If you have TV boxes in storage (not powered up or online), these will grab this update as soon as they are powered up and connected to the internet.
Click here for step by step instructions on how to manually update boxes in storage >>
Please reach out to your Customer Ambassador Todd Banvich if you have any questions, or for help updating your boxes in storage: toddb@odessaconnect.tv or (501) 438-9030.
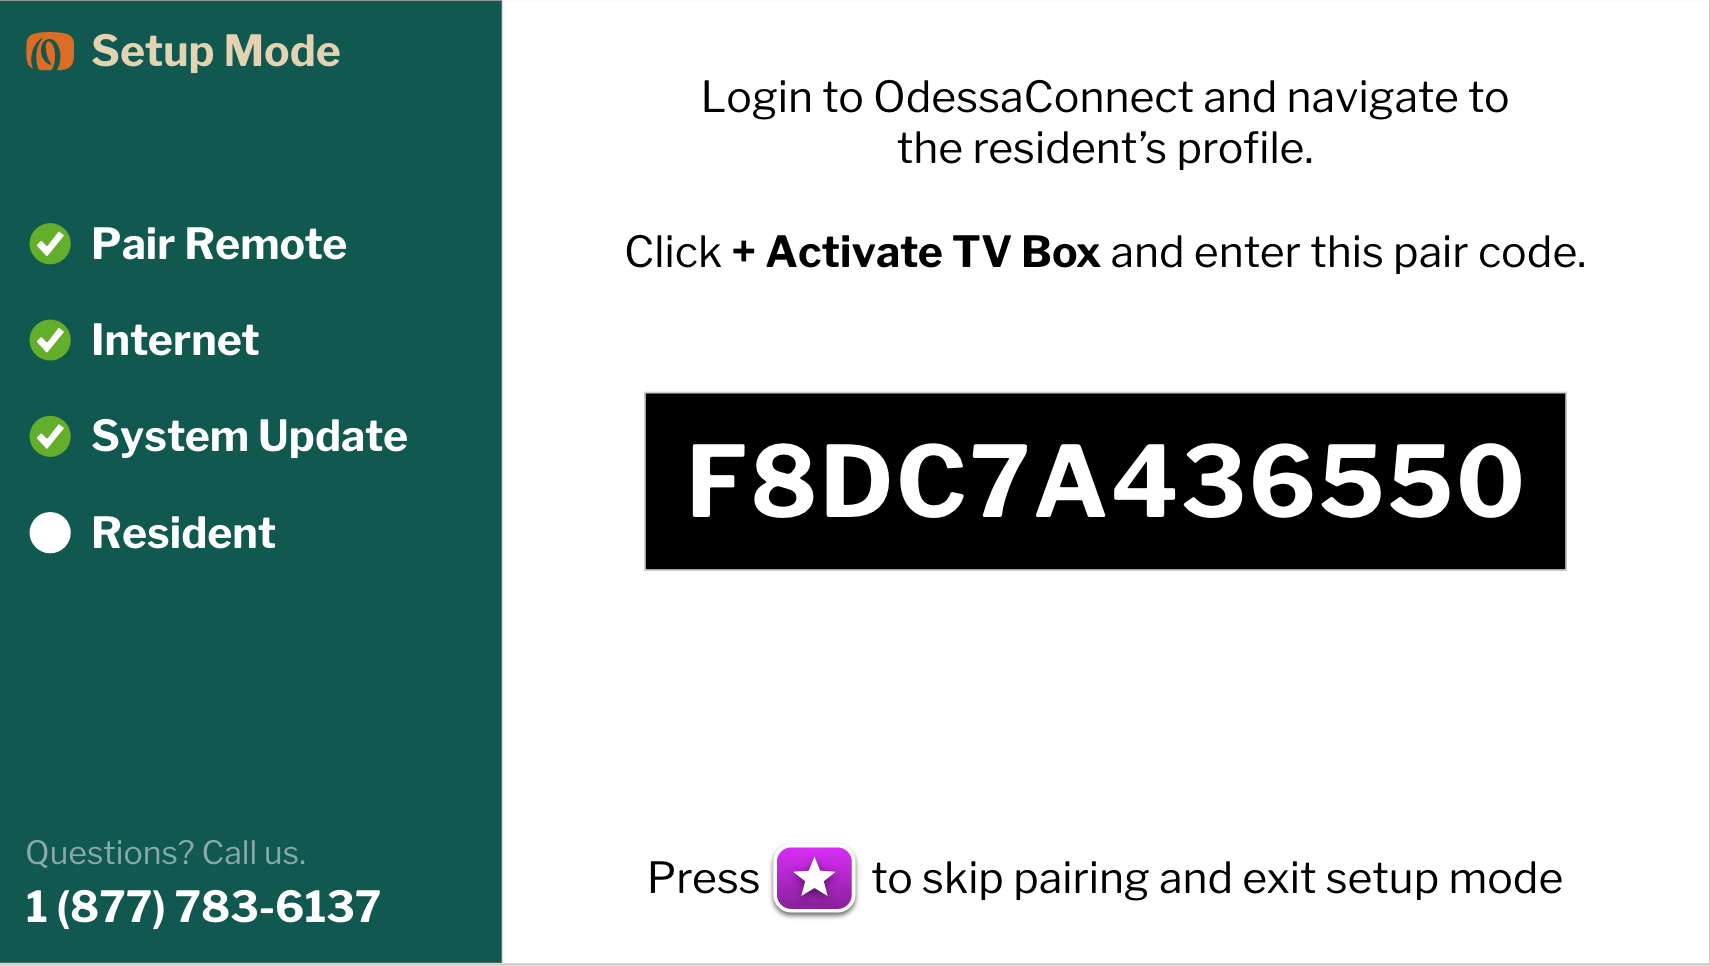
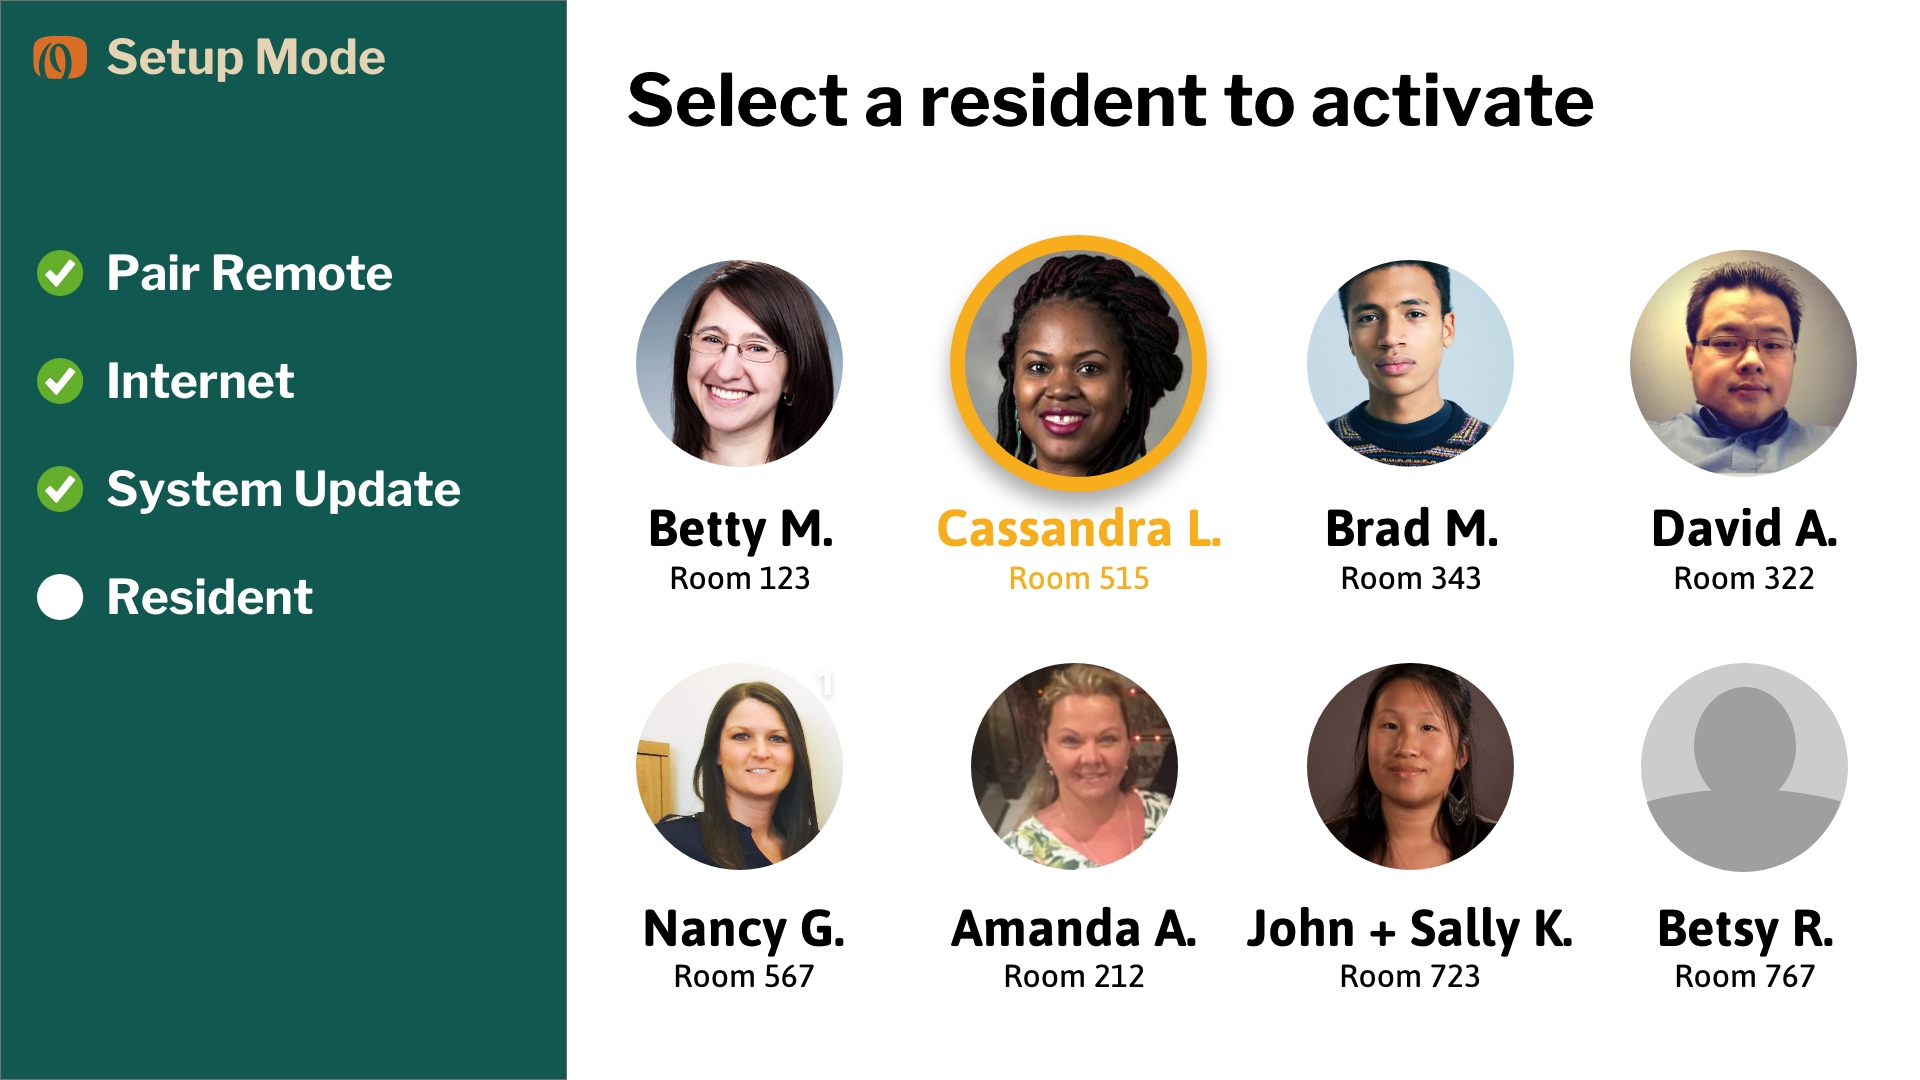
Self-Guided Installation Process
The presentation below walks through the new Self-Guided Install process. Click once on the image to advance through the screens.
If you do not see an image below, click here to view the presentation in your browser, then use the arrow keys < > on your keyboard to advance through the screens.
https://xd.adobe.com/view/283b224d-ac31-4846-ac3b-bbbe842ad9d8-7d68/?fullscreen
Manually Updating Boxes In Storage
BEFORE STARTING:
If your community has an Ethernet connection in the resident’s room, refer to the ETHERNET steps below.
If your community uses Wifi in the resident’s room, refer to the WIFI steps below.
We recommend using a fresh box for this process. If you must use a box that was previously paired to another resident, call us at (877) 783-6137
ETHERNET
Retrieve box from storage closet
Go to resident’s room for install
Connect cables
power adapter to electrical outlet
HDMI from cable box to OdessaConnect box
HDMI from OdessaConnect box to TV input
ethernet cable
OdessaConnect box will power up, then immediately download the new update, then reboot. No action is required - just let the box update itself and wait for it to reboot.
Using the OdessaConnect remote, press the STAR button a couple times until the time and date are displayed correctly on the TV screen.
box will automatically download the SW and reboot. Could take up to 5 minutes to do this.
Box will advance to step 4: Resident Pairing on Self-Guided Install
WIFI
Retrieve box from storage closet
Go to resident’s room for install
Connect cables
power adapter to electrical outlet
HDMI from cable box to OdessaConnect box
HDMI from OdessaConnect box to TV input
Press Up Up Down Down Left Right Left Right and land on bluetooth screen > click on the Network screen
Select the Wifi Network name and enter the password
After connecting to Wifi, the OdessaConnect box will immediately download the new update, then reboot. No action is required - just let the box update itself and wait for it to reboot.
Using the OdessaConnect remote, press the STAR button a couple times until the time and date are displayed correctly on the TV screen.
Box will automatically download the SW and reboot. Could take up to 5 minutes to do this.
Box will advance to step 4: Resident Pairing on Self-Guided Install